

Effective ad design is key to capturing attention, driving engagement, and achieving measurable results in digital advertising. Google Ad Manager is a comprehensive platform for managing, creating, and testing ad designs, equipping advertisers with the tools to optimize ad performance and improve user experience.
In this blog, we’ll explore how to use Google Ad Manager to create and test ad designs. From setting clear creative objectives and choosing ad formats to testing different ad sizes, styles, and placements, this guide will offer practical insights to help your ads make a meaningful impact.
Creating Ad Designs in Google Ad Manager
Building effective ad designs requires careful planning and the right tools. Google Ad Manager offers various features to help brands create visually compelling ads that meet campaign goals. Let’s break down the key steps for designing ads effectively:
Setting Up Google Ad Manager

To start designing ads, ensure your Google Ad Manager account is set up properly:
Create an Account: Sign up at Google Ad Manager using your Google account.
Define Inventory: Set up ad units and group them into placements for better organization.
Add Line Items: Assign targeting options like audience demographics, geolocation, and ad formats.
Run a Test Campaign: Test ad delivery settings to ensure proper setup before launching real campaigns.
Setting Creative Objectives
Start by defining clear objectives for each ad. Your goals will shape the design approach and align creative elements with the campaign’s purpose. Consider:
Traffic Generation: Focus on attention-grabbing visuals and strong CTAs.
Conversions: Emphasize product benefits, trust signals, and persuasive messaging.
Brand Awareness: Incorporate brand colors, logos, and consistent themes for recognition.
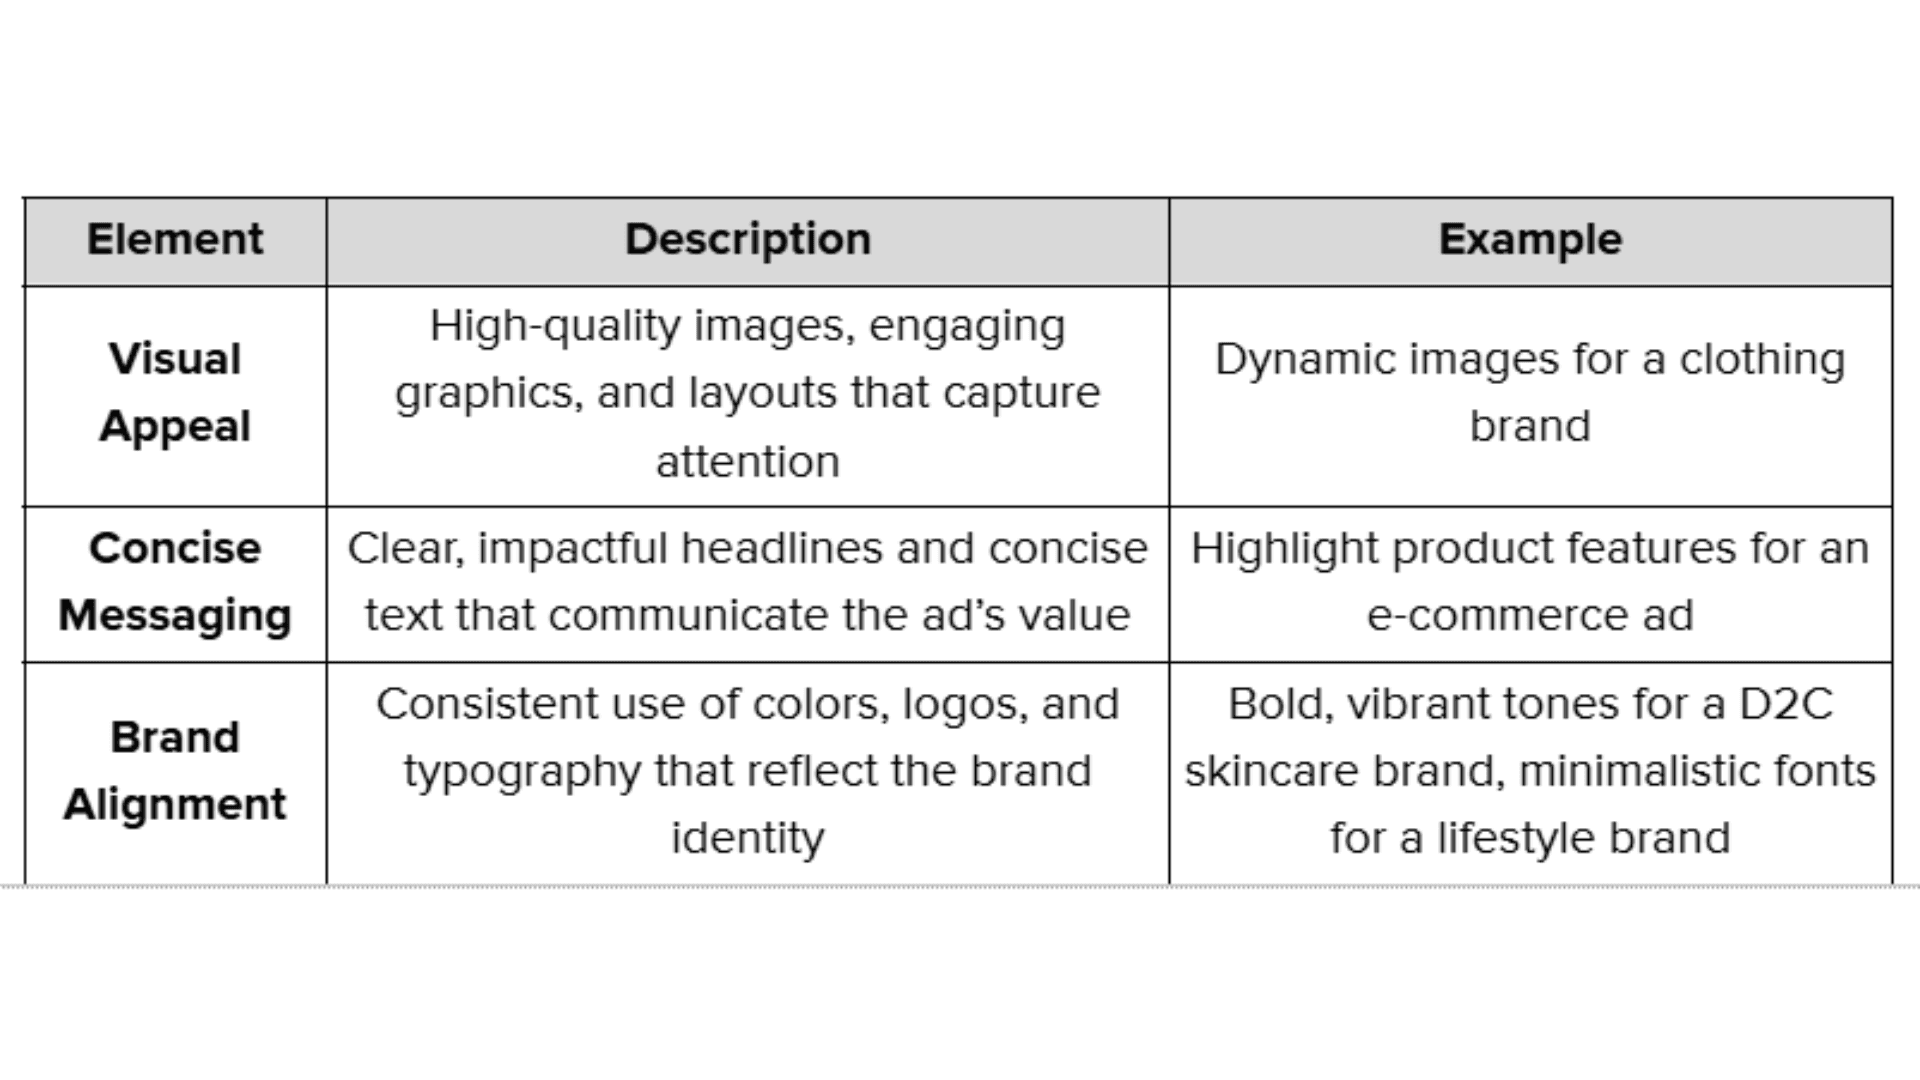
Key Elements of Ad Design
To engage audiences effectively, ad designs should include elements that resonate visually and align with the brand message. Below are some essential design components to consider:
Leveraging Google’s Creative Templates
Google Ad Manager provides a variety of creative templates for different ad formats, including:
Display Ads: Standard banners that can be customized for various placements.
Video Ads: Short, impactful videos designed for maximum engagement.
Native Ads: Ads that match the look and feel of the content they appear within, blending seamlessly with the website.
Enhancing Design with Customization
Customization in Google Ad Manager enables brands to create ads that resonate visually and reflect their unique identity. Here are a few areas to focus on:
Color Schemes: Use brand colors to create a unified look across all ad creatives.
Typography: Select fonts that reflect the brand’s voice—bold for a youthful brand, classic for a professional one.
CTAs and Icons: Add call-to-action buttons or icons that draw the user’s eye and encourage interaction.
💡Pro Tip: Use A/B testing to experiment with design elements and determine which variations resonate best with viewers.
With a well-planned ad design, you’re ready to move on to testing, ensuring that your ads reach their full potential. Next, we’ll look at how to test different creative sizes within Google Ad Manager.
Testing Different Creative Sizes
Testing different ad sizes is essential to understanding how various formats perform across placements and devices. Google Ad Manager allows brands to test multiple ad unit sizes, allowing them to refine their designs for maximum impact.
Setting Up Test Environments for Ad Sizes
To start testing, creating a controlled environment where different ad sizes can be evaluated accurately is important. In Google Ad Manager, you can:
Set up a dedicated test campaign to isolate the performance of different ad sizes.
Assign each ad unit size to specific placements to monitor how each format engages users.
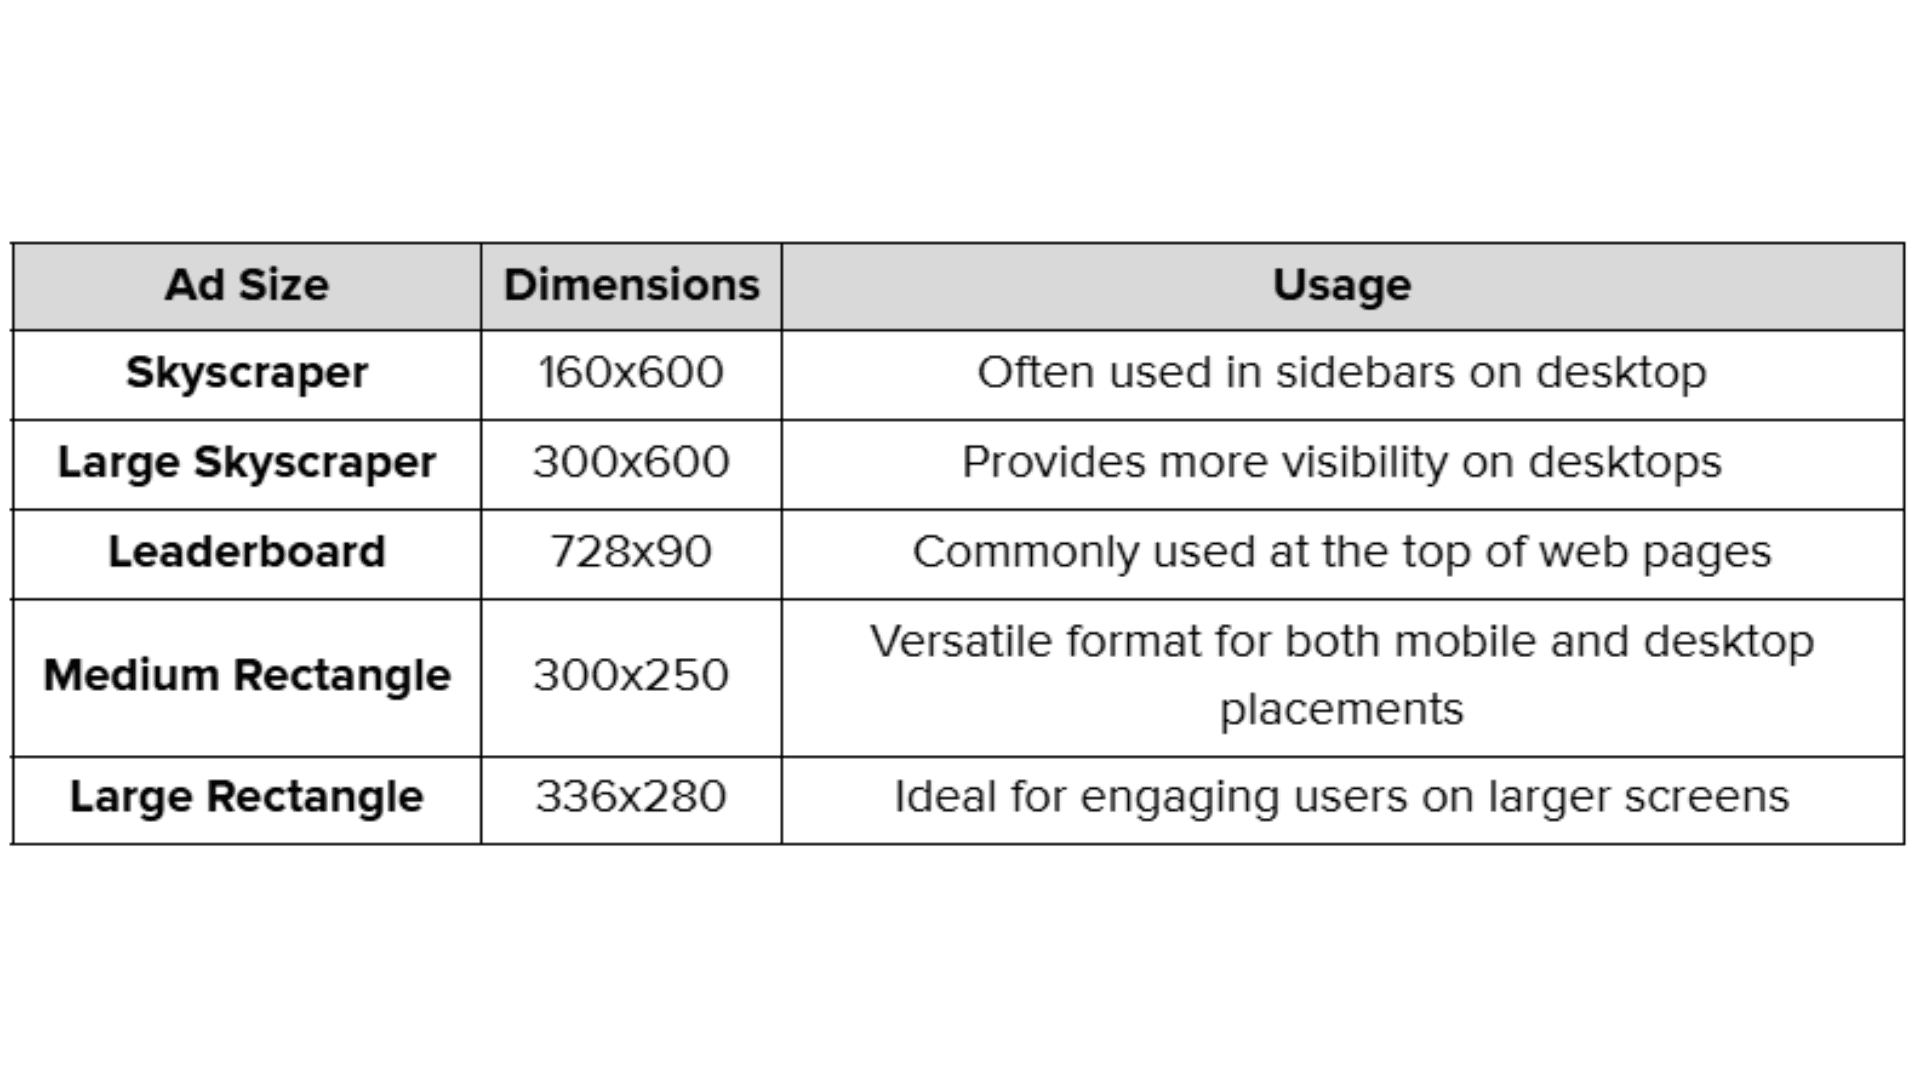
Examples of Ad Unit Sizes to Test
Some standard ad sizes that perform well across Google’s network include:
Importance of Avoiding Responsive Ads During Testing
It’s beneficial to use fixed-size ads rather than responsive ones for accurate test results. Here’s why:
Consistency: Fixed sizes allow for a more consistent view across placements, making it easier to compare performance.
Controlled Variables: You can focus solely on the creative elements within each ad size by eliminating responsive adjustments.
Precise Insights: Fixed-size testing produces more reliable data on which ad sizes drive higher engagement or conversions.
With these ad size tests in place, you’ll better understand which formats best suit your goals. Next, we’ll look at how to set up and run A/B tests for further design optimization.
Setting Up and Running A/B Tests
In Google Ad Manager, setting up structured A/B tests helps brands make informed decisions about creative elements, optimizing ads for improved engagement and conversions.
Step-by-Step Guide to A/B Testing
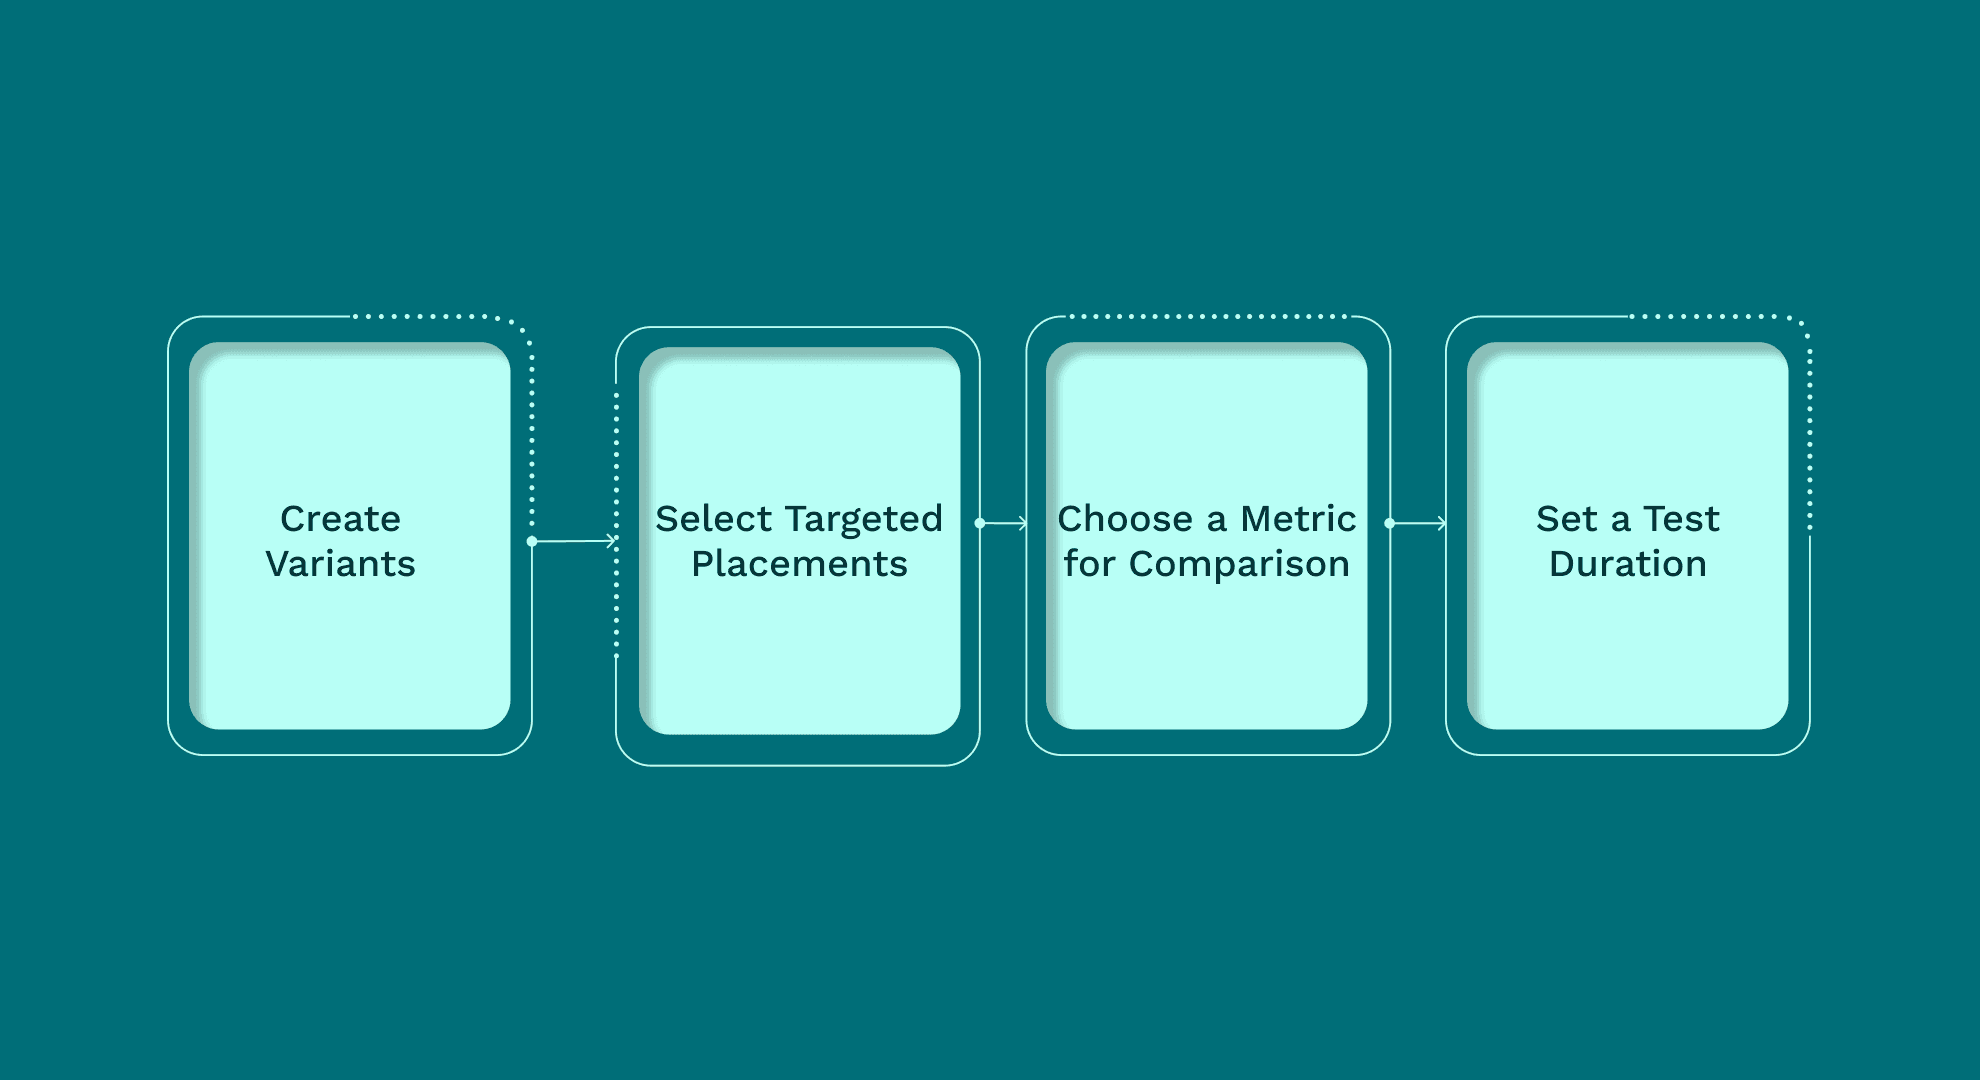
Here’s a straightforward approach to setting up A/B tests for ad designs in Google Ad Manager:
Create Variants: Develop two versions of the same ad with one element changed, such as the headline, image, or call-to-action.
Select Targeted Placements: Assign each ad variant to specific placements. This allows you to track how each design performs in controlled settings.
Choose a Metric for Comparison: Decide on the primary metric to measure success, such as click-through rate (CTR) or conversion rate.
Set a Test Duration: Run the test for sufficient time to gather meaningful data. Depending on traffic volume, a minimum of one week is often recommended.
Assigning Ad Units to Specific Placements
For accurate A/B testing, assigning each ad unit to relevant placements is essential. Here’s how this can improve test accuracy:
Targeted Comparisons: Assigning ad units to placements based on where the audience is most active (e.g., homepage vs. article pages) gives a clearer picture of each variant’s effectiveness.
Controlled Environments: Testing in controlled placements minimizes external influences, leading to more reliable results.
Optimized Budget Allocation: You can allocate your budget more effectively in future campaigns by identifying high-performing placements.
Monitoring Test Duration for Reliable Results
Setting a suitable duration for A/B tests is crucial for obtaining reliable insights. Here are some best practices for timing:
Consider Traffic Volume: The higher the traffic, the shorter the test duration needed to gather adequate data. For lower traffic, a longer test duration (e.g., two weeks) is ideal.
Check for Consistency: Observe the performance trend throughout the test period to ensure the results are consistent and not influenced by temporary fluctuations.
Avoid Premature Conclusions: Ending tests too early can lead to unreliable insights, so let tests run to completion for the most accurate data.
With A/B tests set up, you’ll gain insights into which ad designs and elements resonate most with your audience. Next, let’s explore how to refine ad styles and design elements within Google Ad Manager.
Optimizing Ad Style and Design Elements
Once the foundational ad designs are in place, further optimizing specific style elements can significantly enhance user engagement and ad performance. Here are advanced techniques to refine and improve your ad designs in Google Ad Manager.
Experimenting with Ad Layouts for Different Placements
Optimizing your ad layouts based on placement is crucial to maximizing engagement:
Above-the-Fold vs. Below-the-Fold: Test different designs for placements that appear above or below the fold, as above-the-fold placements generally require more concise, attention-grabbing designs.
Mobile vs. Desktop Layouts: Customize ad layouts according to device preferences, simplifying designs for mobile while utilizing larger layouts on the desktop to accommodate detailed imagery and longer text.
Content-Specific Positioning: Adjust layouts for ads displayed within articles versus sidebar placements, tailoring elements to blend in or stand out based on the ad’s context.
💡Pro Tip: Use heatmaps or click maps to assess which layout designs capture the most attention across placements and devices.
Incorporating Micro-Animations
Micro-animations can draw attention to specific parts of an ad without being intrusive. Here’s how to implement them effectively:
Highlighting CTAs: Animate call-to-action buttons to create a soft pulsing effect, helping guide users toward the action without overwhelming the ad’s visual flow.
Adding Movement to Key Elements: Use light animations like sliding in an image or gently shifting text to capture attention while maintaining a professional look.
Experimenting with GIFs: For display ads, consider using GIFs to add subtle motion to static elements. Ensure that animations don’t distract from the main message or cause loading delays.
Adjusting Design for Seasonal or Event-Based Themes
Seasonal and event-based ad design optimizations can help increase relevance and appeal. Customize your ads to align with specific themes:
Seasonal Colors and Imagery: Use colors and images associated with holidays, seasons, or local events to create a timely connection with the audience.
Event-Specific Messaging: Tailor ad copy and visuals for notable events (e.g., Black Friday, New Year) to make the ad more relatable and drive engagement.
Limited-Time Offer Designs: Incorporate countdowns or urgency elements to highlight limited-time offers and prompt immediate action.
Example: For a spring campaign, an e-commerce brand selling home decor might use pastel colors, floral imagery, and light, airy fonts to evoke the season's freshness and attract customers seeking seasonal updates for their homes.
Testing Optimal Contrast Ratios for Readability
Ensuring text readability across devices is essential for ad effectiveness. Use Google Ad Manager to test various contrast ratios and improve clarity:
Font and Background Contrast: Experiment with high-contrast combinations (e.g., dark text on a light background) to ensure readability across all screen sizes.
Testing in Different Lighting Conditions: Simulate bright and dim lighting conditions to confirm that ad text remains visible in all environments, especially for mobile users.
Accessibility Compliance: Ensure contrast ratios meet accessibility standards (e.g., WCAG 2.0), making your ads more inclusive and accessible to a wider audience.
By applying these advanced optimization techniques, brands can create visually engaging ads that perform well across multiple placements and contexts. Next, we’ll look at how to set up and test native ad styles within Google Ad Manager to maximize their impact.
Native Ad Style Experiments
Native ads, designed to blend seamlessly with the content they appear alongside, offer a unique way to connect with audiences in a natural, unobtrusive format. Google Ad Manager allows advertisers to create and test native ads, optimizing them to align with site aesthetics while achieving high engagement.
Creating Native Ads in Google Ad Manager
To create effective native ads, use Google Ad Manager’s tools to match the ad’s look and feel to the website’s content:
Create Native Ad Styles: In Delivery > Native > New Native Ad, choose Guided Design Editor (for predefined layouts), HTML & CSS Editor (for custom ads), or Android & iOS Code (for app ads). Set ad size, format (Content, Video Content), and layout.
Create Native Ad Units: Set size (Fluid or Fixed), select Native inventory and configure targeting (location, device, etc.).
Add Line Items & Creatives: Name line items to match native style, add creatives with relevant details, and enable banner competition by including both Native and banner sizes.
💡Pro Tip: Avoid making native ads look overly similar to editorial content; maintain subtle branding elements to ensure transparency and build viewer trust.
Testing Native Ad Variations
Experimenting with native ad styles helps identify what resonates best with the audience. Here are some elements to consider testing:
Headline and Copy Tone: Test a range of tones, from conversational to formal, to see which style most effectively engages users.
Image Variations: Use different image styles, such as lifestyle vs. product shots, to determine which type performs better for your audience.
Call-to-Action Positioning: Experiment with CTA placement within the native ad to encourage clicks without interrupting the ad’s natural flow.
Analyzing Native Ad Results
Understanding the performance of native ads requires monitoring specific metrics within Google Ad Manager. Here’s how to evaluate native ad effectiveness:
Engagement Rate: Measure how often users interact with native ads compared to traditional display ads.
Time Spent on Page: Analyze whether native ads encourage users to stay on the site longer, indicating increased relevance.
Conversion Rate: Track conversions resulting from native ads to assess their impact on user actions, such as purchases or sign-ups.
With native ad style experiments, you can fine-tune ads to create an engaging, natural experience that enhances user interaction. Next, we’ll explore advanced testing methods and tools to gain deeper insights into ad performance in Google Ad Manager.
Advanced Testing Methods and Tools
Advanced testing methods can provide deeper insights into ad performance beyond standard A/B and native ad tests. Google Ad Manager and additional tools offer features to help advertisers optimize creative testing and ensure ad delivery accuracy.
Leveraging Additional Tools for Enhanced Testing
Google Ad Manager integrates well with other tools to expand testing capabilities. Consider using these complementary tools:
Google Optimize: Allows for detailed testing of ad placements and formats on web pages, helping brands understand the impact of ad location and format on engagement.
Firebase: Useful for mobile-focused testing, Firebase provides analytics that track in-app ad interactions, helping brands refine mobile ad experiences.
Google Analytics: Offers insights into user behavior after interacting with ads, providing data on user flow, conversions, and content engagement.
Testing for Ad Delivery Accuracy
Ad delivery accuracy ensures that ads are displayed as intended and reach the correct audience. Google Ad Manager provides options for verifying delivery:
Geo-Targeting Checks: Ensure ads reach the intended locations by testing delivery based on specific geographic parameters.
Frequency Capping Verification: Confirm that frequency capping settings function correctly so users aren’t overexposed to the same ads.
Audience Segmentation Accuracy: Monitor how effectively ads reach selected audience segments, refining delivery criteria based on performance insights.
Generating Test Data for Comprehensive Analysis
Test data generation provides valuable insights that help advertisers anticipate ad performance and refine strategies before launch:
Simulated Audience Data: Generate simulated audience interactions to test ad performance across various demographics or interests.
Load Testing for High Traffic Scenarios: Simulate high-traffic environments to ensure ad performance stability. This is particularly useful for high-traffic campaigns or time-sensitive promotions.
Cross-Device Testing: Generate test data across devices (e.g., mobile, tablet, desktop) to assess ad adaptability and effectiveness across formats.
These advanced testing methods help advertisers gain a nuanced understanding of how ads perform across different environments and audiences. Brands can refine their ad strategies with comprehensive data insights for maximum impact. Next, we’ll look at how to analyze and interpret results to apply learnings for future ad optimizations.
Analyzing and Interpreting Results
After running ad tests, analyzing the results is essential for understanding what works and identifying areas for improvement. Google Ad Manager provides robust tools for viewing and interpreting ad performance data, enabling brands to apply insights that enhance future ad designs and campaigns.
Viewing Results in Google Ad Manager
Google Ad Manager offers a straightforward approach to accessing test results:
Performance Reports: View detailed metrics for each ad unit or test variant using the reporting feature.
Real-Time Data: Monitor real-time performance data to see how users are interacting with ads in that moment.
Customizable Reports: Create custom reports focusing on specific metrics or timeframes, helping identify trends and optimize based on detailed insights.
💡Pro Tip: Set up automated reports to receive performance updates regularly, allowing for quick adjustments when necessary.
Understanding Key Performance Metrics
Knowing which metrics to focus on is crucial for accurately interpreting ad performance. Here are the most valuable metrics to review:
Click-Through Rate (CTR): Measures the percentage of viewers who clicked on the ad, indicating the ad’s appeal and relevance.
Conversion Rate: Tracks the number of viewers who completed the desired action after clicking the ad.
Engagement Rate: Looks at interactions within the ad, like video plays or scroll actions, to assess the ad’s ability to hold attention.
Viewability Rate: Reflects the percentage of the viewable ad on the screen, helping brands understand visibility factors.
Example: A high CTR but low conversion rate could suggest the ad is attention-grabbing but might need more effective messaging to drive conversions.
Applying Insights for Future Ad Optimizations
Interpreting ad test results effectively means using them to guide future creative decisions. Here’s how to apply your learnings:
Identify Winning Elements: Recognize which elements (e.g., headlines, visuals, CTAs) consistently perform well and integrate them into future ad designs.
Adjust Underperforming Components: Modify or replace elements that didn’t perform as expected to improve future ads.
Iterate with Continuous Testing: Apply a cycle of ongoing testing, using insights from each campaign to inform the next, building a continuously improving strategy.
Brands can create increasingly effective campaigns with a structured approach to analyzing and applying ad test results. In the conclusion, we’ll summarize the importance of continuous testing and the role of data-driven decisions in maximizing ad performance.
Conclusion
Creating and optimizing ad designs in Google Ad Manager requires clear objectives, diverse formats, and ongoing refinement based on data. Continuous monitoring is vital as audience preferences and trends evolve.
For brands scaling their efforts, managing creative variations can be complex. GoMarble simplifies this with AI-powered solutions and expert insights, helping craft impactful ads and delivering real-time data for continuous improvement. By combining expertise with advanced tools, GoMarble ensures optimized ads that drive engagement and boost ROAS.
Ready to enhance your ad testing and design strategy? Connect with GoMarble today.